

Reduce Scars with Chemical Peels in Miami Bal Habour
The best way to reduce scars is by the use of chemical peels. Chemical peels can give you the best result especially when it comes to acne scarred face. Scars on the hidden areas of the body may not be a big deal to you, but scars caused by acne on the face can be depressing. Remember though that scars that are deep may not respond well to chemical peels, and heavy acne scars may require you to seek for another option. Despite this issue, it is still important to know how to reduce scars with chemical peels.
- Know about glycolic acid.
One of the most popular chemical peels is the glycolic acid. This is usually used for a very light scarring on your face. Glycolic acid has fewer side effects and the mildest among the chemical peels available. It works by drying the skin and sloughing off the top layer of mostly dead skin. It has also been used to remove blackheads and whiteheads. Acne scars appear after acne breakouts and skin imbalances have subsided. Acne can leave your skin with scars after the healing process. Even if your skin will be back to normal, there are still scars that won’t disappear completely.
- Use TCA peel.
If you have a very deep scar, you can use Jessner’s for TCA peel. But make sure to take the risk of some side effects. The skin destruction that it could create will be deeper to under layers of the skin to allow the new skin to surface.
- Know what to expect after the process.
Since these are chemicals, expect to feel some mild burning sensation when the chemicals are applied. You can apply glycolic peel during your lunch break. For severe scarring, it will require you to take a few days off from school or work because your skin will turn to many shades of white and pink while the skin flakes off to allow new skin to appear.
- Know how much time you need to invest in the session.
It will take at least 2 to 4 peels before you will see the changes in your scarring removal. The method can be done safely every three weeks. You just need to be careful with some complications after the application such as infection, scabbing, or persistent pain. But this can rarely occur as long as you follow the instruction.
- Look for a licensed dermatologist or plastic surgeon to do your chemical peel.
Make sure to find someone who is trustworthy. Most chemical peels are done for cosmetic purposes and usually not covered by medical insurance. There are over the counter lotions, face masks, and crems that contain AHA or other fruit based acids, but these have lesser effect compared to chemical peels.
Chemical peels can help you achieve a clear complexion and is also one of the simplest ways to get rid of acne scars for good. Mild to strong chemical peels can help reduce the appearance of scars, remove damage skin cells from the top layer of the skin. This could also improve the texture and tone down your skin down overall. Chemical peels can also help reduce the future outbreaks of acne because it helps increase the skin’s elasticity.
How to Use the 3 Most Common Types of Face Peels

Facial peel is described as a form of chemical peel wherein an acid solution is put on the face to eventually obtain softer skin and to fix some of the skin’s imperfections. The three fundamental peels that are obtainable at present include superficial, medium-depth and deep skin peels. It is advisable to talk first to your dermatologist before using any form of facial peels. He is the only one who can recommend the best type of face peels for your skin problem. You may also read about the types of face peels below to get some information.
- Using superficial peels
If you will decide on using face peels to eliminate the tiny laugh lines at the crook of your eyes or mouth or if you possess small streaks of blemishes on your skin and you desire to smoothen them out, superficial peels can be used to help you eliminate the imperfection. Since this type of facial peels can only eliminate the exterior coating of your skin, the curative period is only short. The superficial peel is usually performed together with a gentle chemical mixture like salicylic or glycolic acid. This type of face peel can be done in no time at all that is why you can even go back to your usual day work after the application. However, this can result to facial redness and shedding after the process, which you might experience for five days. The result of superficial peels can be seen several hours or days after the treatment.
- Using medium-depth peels
Once your skin trouble becomes more profound or it had already gone beyond the epidermis skin level, medium-depth peels is required. The most usual type of chemical used for this kind of chemical peels is trichloroacetic acid. Individuals with sun or age spots can use this type of face peels for the elimination of the problem.
The TCA eliminates the topmost coating of your skin that is why you must take good care of your skin properly when using this type of face peels to prevent infectivity. If the part of your skin that had been treated is huge or profound, they need to be covered following the treatment to shield it against contamination. Medium-depth peels can cause searing result as well as soreness, but in few cases it only provides a pale pink or reddened look on your skin. It may need about one to two weeks or might be lengthier to cure totally and the outcomes might only be noticeable after several weeks.
- Using deep skin peels
This kind of face peel frequently requires anesthesia administration to eliminate profound facial skin coatings due to scarring and other forms of profound skin imperfections. Serious soreness might also be experienced from this type of face peel, but you can normally manage it through the use of over-the-counter medicines. You will also experience lengthy healing period from this type of face peel and you can only notice the desired outcomes several months after the medication. One of the chemicals used in this form of face peel is TCA and not phenol for the reason that it involves scarring as well as toxicity concerns.
There are different types of facial peels at various intensities. Each type has a purpose to serve therefore you must know about each type before you even use one for your skin condition.
How to Treat Leg Scars with Chemical Peel with Just 6 Steps to Follow
Treat Leg Scars with Chemical Peel
- Gather materials you will need for the chemical peel.
Prepare all the necessary materials such as a small cucumber, food processor, cheesecloth, kettle, cup, 1 tsp. chamomile tea, 1 tsp green tea, saucepan, 1 pack unflavored gelatin, 1 tsp. aloe vera gel, spatula or cosmetic masking brush.
- Start by cutting the cucumber and remove the seeds.
Cucumber is good for toning and tightening the skin. Get a food processor and put the fresh cucumber and mash it thoroughly. Get a container where you can strain the cucumber using clean cheesecloth, and keep the cucumber juice for later use. Cucumber has a natural astringent that could smooth down scars and fine lines. It is also a good toner which tightens the skin. Due to the cucumber’s high water content, it hydrates the skin thus creating a glowing and healthy skin.
- Prepare 1 tsp. chamomile and 1 tsp. green tea leaves in a cup.
Pour in the boiled water from the kettle. You should fill the cup only half way of the boiled water. Look for a cover for the cup and cover it for at least 10 minutes. Chamomile soothes the skin and the effect of green tea could heal and remove the puffiness of the skin. Strain the boiled chamomile and green tea and put the juice in a saucepan. Slowly heat the saucepan and pour in the gelatin and stir it constantly until it is completely dissolved.
- Pour in the cucumber juice and aloe vera juice to the gelatin solution;.
Stir well to thoroughly mix the formula. Aloe vera is good for removing scars, burns and any unwanted blemishes and can quickly heal the skin.
- Cool down the mixture.
Let the mixture cool down for a few minutes before putting it inside the refrigerator. Leave it for at least 30 minutes or until the gelatin has reached its gel-like consistency.
- Apply the mixture to the affected area.
This can be done by using a spatula or a cosmetic masking brush. Leave the mixture for at least 30 minutes. Remove the peel by slowly stripping it away from your skin. Apply the solution every week until you get the desired result.
Always consult your doctor before attempting to use home chemical peels for leg scars. This is to ensure that you will not have any allergic reaction to any of the ingredients that you plan to use.
How to Clean Face Between Chemical Peels – 7 Tips to Keep Facial Skin Protected
A chemical peel is a type of technique that blazes the topmost coatings of the skin in order to give way to the development of fresh and invigorated skin in its proper location. It contains the ability to give you an intensified skin tone wile lightening the creases, blemishes as well as age specks on your face. It can also remedy further skin problems like rosacea. It is important to clean face between chemical peels and here’s what you should do about it.

Clean Face Between Chemical Peels
- Know more about how chemical peels are done.
The technique performed by a physician includes applying a chemical blend of acid onto the skin to develop a burnt inflammation to unpeel the topmost coatings of the skin. However, you should be extra cautious in taking care of your skin in between chemical peels as it starts to heal because of the soreness you will experience. Sanitizing your face between chemical peels will defend your skin against probable bacterial infectivity as well as intensify recuperating period.
- Purchase the cleansing products suggested by your physician.
The cleansing products that doctors usually suggest are tremendously mild on your skin as well as contain antibacterial assets. If you are wearing a dressing after chemical peels, make sure to take it off before cleansing your face.
- Splatter chilled water on your face.
Do this several times daily especially when you wake up in the morning, following or after doing any type of physical actions. You can also do this when there are dirt traps on your face and prior to going to bed. During the first day after you have undergone the chemical peel treatment, put water on your face particularly if it is extremely excruciating to use a cleanser.
- Dispense a small quantity of cleanser on your fingertips.
Rub it tenderly in spherical movements on your face. The tender movement is useful in healing as well as invigorating your skin while you are cleansing it. After cleansing your face with a gentle cleanser, make sure to rinse it off with warm water to avoid further irritation. Splatter additional water onto your face for more convenience.
- Dry your face.
Use a sanitized new towel to dry your face, but make sure to do the drying gently. Just pat the towel tenderly on your face. Never rub it off rigorously.
- Remember to moisturize and put on some necessary treatments.
Put on a cream or ointment on your face if your physician had directed you to do it. You can also put on a tiny quantity of moisturizer on your fingertips and rub it gently onto your face in spherical movements until the moisturizer is no longer noticeable. Put on a slight coat of acne treatment, but make sure that it is placed before putting on the moisturizer particularly if it is alcohol-based.
- Do not expose your face under the sun until it is healed or there is no more peeling.
Make sure that when you go out in the open air, you should put on a wide-brim hat to protect your face. When your face is no longer painful, you can start putting on sunscreen with SPF after every facial cleansing routine. This is considered extremely necessary due to the fact that your skin will be very responsive to the sun.
Cleaning the face is essential in between chemical peels. That way, you can moisturize your skin. The tips above are some things to consider carrying on with the task.
How to Make Homemade Chemical Peels in 7 Steps
The first thing that you should do if you want to make a homemade chemical peel is to pick a good source of acid to use in your chemical peel. We have lots of available sources in the market that could make your skin smooth and subtle as a baby. Many people are now discovering the powers it could give using a natural at home chemical peel. Homemade chemical peels are used to exfoliate dead skin cells and make way for the new skin to emerge, thus leaving rough and flaky facial skin feeling smooth and young again. So you can enjoy a satisfying natural spa experience right in your own homes with these homemade chemical peels. Here are steps on how to make homemade chemical peels.
Homemade Chemical Peels
Step #1: Start with preparation.
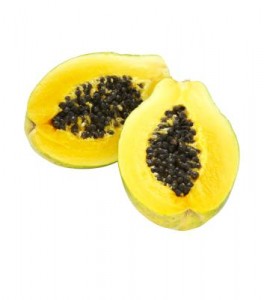
Prepare all the things you’ll need such as acidic fruits (lemons, limes, pineapple, or papayas), gelatin or yogurt, stove pot, blender, and stove.
Step #2: Pick fruits of your choice listed in number 1.
Mash it manually or use a blender to make things easier for you. Just make sure that if you do it manually, the large chunks will be dissolved. The reason for mashing the fruit is to extract and get all the natural oils and natural acids of the fruit. These are the natural chemicals that will help lift out the impurities of your skin.
Step #3: Prepare the gelatin or yogurt.
Prepare the gelatin by dissolving it to form a slimy texture. Get a pot and begin heating it using low fire. Mix the gelatin to dissolve it thoroughly. If you will use yogurt, just slightly heat the yogurt with a temperature that will not burn your skin. Gelatin and yogurts acts as thickening agents for your homemade chemical peel.
Step #4: Blend the mashed fruit with the gelatin or yogurt.
When gelatin and yogurt begin to heat slightly, pour in the raw and mashed fruit and turn off the heat. Continue mixing the ingredients until it is thoroughly blended and to be sure it will not harden. The ingredients will not harden if you are using yogurt. Let it cool down for a few minutes and test with your fingers if the temperature is tolerable to your skin.
Step #5: Apply the solution on your face.
When you think the temperature is enough, apply it to your face while still warm. Leave the natural chemical peel for at least 15 to 30 minutes.
Step #6: Remove the peel.
When the time is up, slowly remove the peel by washing it with water. Don’t try to scrub your face because your skin could be sensitive from the acids of the fruit. Be sure your eyes will not come into contact with the mixture.
Step #7: Consider all other precautions.
Test for any allergic reactions by rubbing a small amount of mixture into your jaw line. You will see the difference after 3 to 4 uses. Use a moisturizer after every session of using chemical peels. If skin feels so hot and irritated, wash off the mixture immediately. Always use sun block creams because skin may be sensitive after the treatment.
You don’t need to spend a fortune to make yourself beautiful and radiant all the time. All you need is a little wonder coming from nature. Create your own homemade chemical peel through the steps provided herein.
How to Know About Chemicals Used For Facial Peel –
6 Tips to Get to Know about these Chemicals
Most facial peels are so simple to do and can be done during lunch breaks. Chemical facial peels are most preferred by those who don’t want to undergo expensive and too invasive procedures to improve their skin. Facial chemical peels are actually one of the oldest cosmetic procedures in the world. This method of improving skin dates back during the early Egyptian, Greek, and Roman civilizations. Dermatologists are not yet known during those times, and chemical peels using natural ingredients are the only way they know. Nowadays, chemical peels are becoming popular because of the nearly immediate result and could be performed as an outpatient procedure. Here is how you can learn more about chemicals used for facial peels.

Chemicals Used For Facial Peel
- Learn about the acid used for chemical peels.
Chemical peel is a treatment that uses acid solution to get rid of the damaged areas of the skin. It is typically administered as a facial peel that could enhance and smooth the texture of the skin.
- Learn how it works as well.
Our skin is made up of two layers, the epidermis and the dermis. The chemicals used to create a facial peel works by removing the top layers of the affected area, thus revealing the undamaged layers of skin underneath. Some mild chemical peels can only remove layers of the epidermis, while facial peels with stronger chemicals will reach the dermis. It is always advisable to consult your doctor to know which facial peels are best for you. The doctor will need to determine how deep or how damaged your skin is, to that he/she could choose the proper chemicals for your facial peel.
- Learn about the benefits of these chemicals.
Facial peels can do wonders to the skin by restoring the skin’s youthful appearance. It helps remove the signs of sun damage, age spots, scarring or wrinkles. Chemical facial peels are less invasive compared to surgery. It doesn’t also require long periods of recovery. People undergoing chemical peels are usually for cosmetic reasons, although sometimes they are done to remove precancerous skin growths.
- Learn about AHA.
Chemical types used in chemical peels vary in strength and depending on the severity of the skin damage that will be treated. Mild chemicals in facial peels are known as Alpha Hydroxy acids that includes glycolic, lactic, and fruit acids. These acids are responsible in peeling away the layer of epidermis. This is the type of acid used to treat dry or rough skin, and treatments can be repeated weekly.
- Learn about TCA.
On the other hand, trichloroacetic acid or TCA is slightly stronger than Alpha Hydroxy acid. This will remove more of the epidermis than the milder one. Usually, this kind of chemical is used in treating fine lines, moderate sun damage, and uneven pigments.
- Learn about phenol.
The phenol chemical peel is considered as the strongest kind of chemical peel. This is used to remove deep wrinkles, scarring, intense discoloration on the skin, and pre-cancerous growths. The treatment will take about one to two hours to perform and at least 2 weeks of recovery period. At first, patient will experience redness and mild discomfort.
Every patient who undergoes this kind of treatment will expect a big improvement of their skin. One should understand that this change will not happen over night, because a patient should know that skin might become red, peeling and sensitive after undergoing chemical peels.
How to Use Home Facial Chemical Peel – 7 Tips that Will Make the Effort Worthwhile
Facial peel is a process of putting chemicals on your face to eliminate the injured exterior coating of your skin. These chemical peels vary from gentle to intense. The mild form of chemical peel can be utilized at home while the intense one is done by a dermatologist. Here is how you can use home facial chemical peel.

Use Home Facial Chemical Peel
Tip #1: Learn more about what these facial chemical peels are.
The mild form of chemical peel that can be used at home is alpha-hydroxy acid. This AHA contains glycolic, lactic as well as fruit acids. This is considered as the gentlest kind of chemical peel. It is employed to remedy dehydrated skin, tiny creases, acne or blemished skin by means of tenderly peeling off the topmost coatings of your skin. It can be put on once a week. It is better if you will mix it with facial cleansers and put on every day as a segment of your skincare routine.
Tip #2: Compare it with other forms of facial chemical peel.
Trichloroacetic acid is considered a medium to intense form of chemical facial peel. It is employed to remedy blotchy skin, creases as well as gentle to reasonable sun injury, and irregular discoloration predicaments that cannot be efficiently remedies through AHA. Phenol, on the other hand is the strongest among chemical facial peel that you can obtain. It can be utilized to remedy profound creases, disfigurements, pigmentation, sun injury, or to eliminate pre-cancerous development. This is done in as much as two hours and you will encounter gentle uneasiness and redness to the affected part all throughout the two-week recuperating time.
Tip #3: Prepare for the process.
Weaken the trichloroacetic acid until it reaches 25% solution by means of mixing three parts water and one part thrichloroacetic acid. However, if you can purchase a pre-mixed solution, you should not make it by yourself anymore.
Tip #4: Cleanse your face.
Do this by using a gentle cleanser and dab it gently to dry in preparation for the application of the chemical peel. Make sure that you will not utilize an exfoliating or scrubbing cleanser.
Tip #5: Put on the chemical peel by means of a cotton pad or ball.
This process should be until each of the involved parts is masked. You may require putting on several coating particularly if your skin is extremely injured in identifiable sites.
Tip #6: Let the solution stay for at least five minutes.
This should be done prior to washing it away with chilly water. However, if the chemical peel you are going to use is in lotion form, make sure to let it stay on your skin for at least one hour prior to washing it off.
Tip #7: Use an antibacterial ointment.
Put on the triple antibacterial ointment as soon as you cleanse and dry up your skin to shield the new, natural skin. You may experience a stinging or blazing feeling, but you should not worry because this is just an ordinary occurrence. Make sure to put on sunscreen when you go out in the open air for further skin protection.
These are seven tips that will make home facial chemical peel well worth every effort and investment you make. If you think you cannot successfully do it on your own, you may consider asking help from a dermatologist instead.